

On AllBetter
Need a local pro?
Post the job free and compare bids from identity-verified local pros — payment held in escrow until the work is done right.
Find a verified pro near you →Visual Impact Achievable at 40% Cost
Avg. Kitchen Remodel (NAHB)
Budget Lost to Layout Changes
The average American kitchen remodel costs $35,000 to $75,000, according to the NAHB. But homeowners who follow a budget-first renovation plan consistently achieve 80% of the visual impact for 40% of the cost. The difference is not about cutting corners. It is about knowing which dollars create visible results and which ones disappear behind walls where nobody will ever see them.
How do you create a budget-friendly renovation plan? Start by separating your project into structural work (behind the walls) and finish work (what you see and touch). Spend the minimum necessary on structural elements, then allocate the remaining budget to high-impact finishes like hardware, lighting, paint, and fixtures. Keep the existing layout whenever possible, since moving plumbing or walls can consume 30% to 50% of a renovation budget before any visible improvement occurs.
Want quick wins before the big project? See 5 cheap weekend home refreshes, most under $200.
The Core Principle: Keep the Layout, Upgrade the Surfaces
Skipping the DIY route? You can post the job on AllBetter and have ID-verified pros bidding in about 10 minutes — no spam calls, payment held in escrow until you approve the work.
Moving a sink, toilet, or shower even a few feet requires opening walls, rerouting pipes, pulling new permits, and scheduling inspections. That single decision can cost $3,000 to $8,000 before any visible improvement happens. Moving electrical outlets or adding circuits adds another $1,000 to $3,000. For budget-conscious renovations, layout changes are the fastest way to burn through funds.
Professional renovators who work within tight budgets follow one rule: keep fixtures where they are and upgrade how they look and function. A bathroom where the toilet, sink, and shower stay in place but receive new fixtures, fresh tile, updated lighting, and modern hardware looks completely transformed at a fraction of the cost of a layout change.
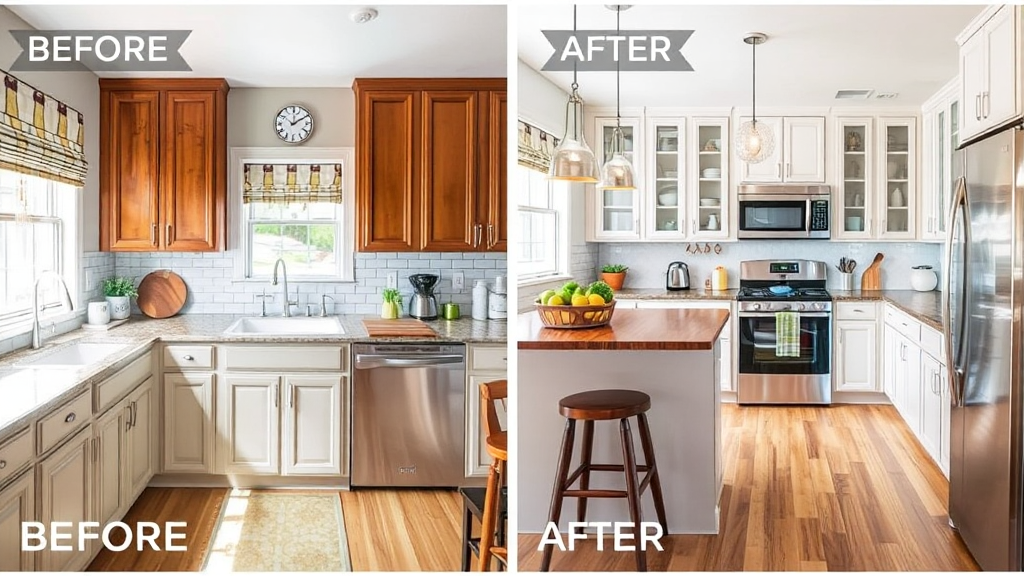
This principle applies across every room. A kitchen with the same cabinet footprint but painted doors, new hardware, upgraded countertops, and better lighting feels like a different space. The structural bones stay the same. The experience changes entirely. Even in living rooms and bedrooms, the same logic holds — fresh paint, modern light fixtures, and updated outlet covers transform the atmosphere without any structural expense.
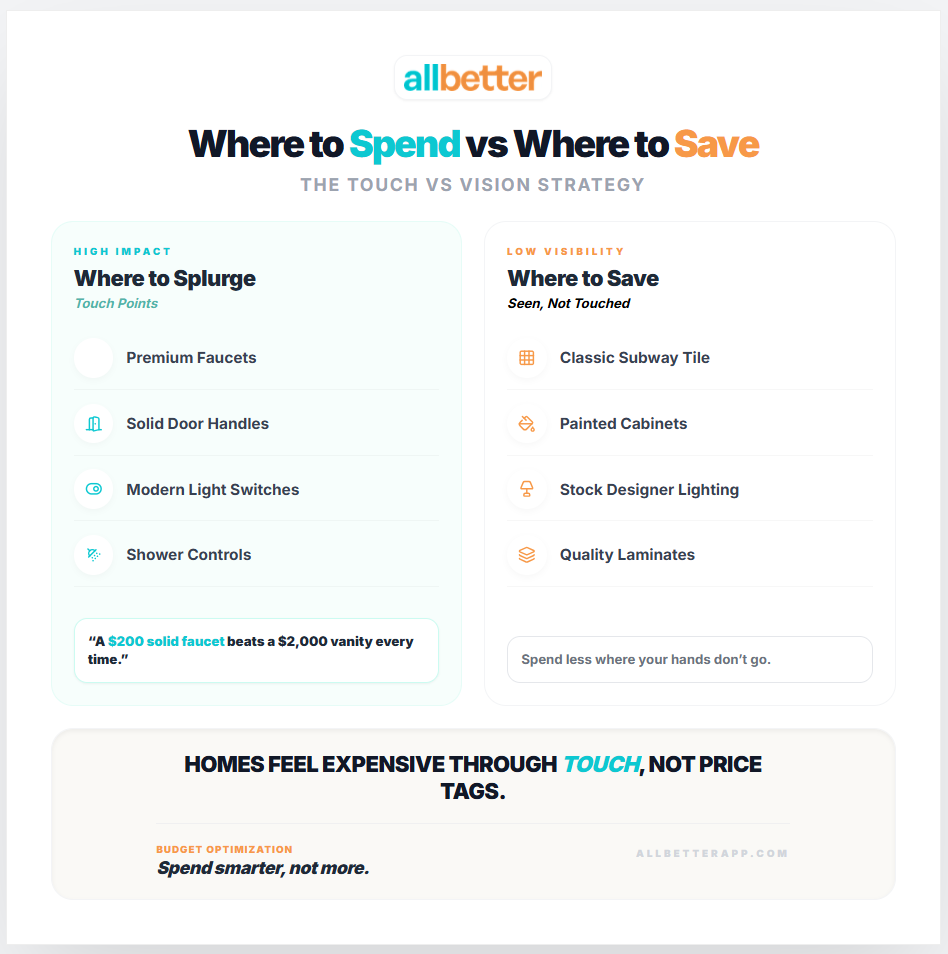
A solid-brass faucet creates a stronger quality impression than a vanity upgrade costing 10x more. Touch points beat background materials every time.
The Splurge vs. Save Framework
Not every dollar in a renovation carries equal weight. Some purchases create an immediate perception of quality. Others are invisible. The key to stretching a budget is understanding which elements your brain uses to judge a room’s quality level.
People experience homes through touch and light before anything else. A heavy brass faucet, a smooth-turning door handle, or a well-lit bathroom mirror creates a feeling of quality that expensive tile behind the toilet never achieves. This is the touch-point principle, and it drives the entire splurge vs. save framework.
| Category | Strategy | Budget Approach |
|---|---|---|
| Faucets and hardware | Splurge | Solid brass or heavy-weight fixtures ($150-$400 each) |
| Light fixtures | Splurge | Statement pieces at eye level ($100-$300 each) |
| Cabinet doors | Save | Paint existing ($200-$500 total) vs. replace ($5,000-$15,000) |
| Tile and backsplash | Save | Classic subway tile ($3-$5/sq ft) vs. custom mosaic ($15-$40/sq ft) |
| Countertops | Middle ground | Butcher block or quartz-look laminate ($20-$50/sq ft) vs. natural stone ($60-$150/sq ft) |
| Flooring | Save | Luxury vinyl plank ($3-$7/sq ft) vs. hardwood ($8-$15/sq ft installed) |
A $200 solid-brass faucet creates a stronger impression of quality than a $2,000 vanity upgrade. A $150 modern light fixture above a bathroom mirror transforms the room more than $1,500 in premium tile. These priorities seem counterintuitive, but they are backed by how buyers and guests actually perceive spaces during walkthroughs.
The Five-Step Budget Renovation Process
Follow this sequence to ensure your budget produces the maximum visible impact. Each step builds on the previous one, and the order matters.
Step 1: Fix safety and structural issues first. Before any cosmetic work begins, address anything that affects safety or structural integrity. This includes water damage, electrical hazards, mold, and foundation problems. These repairs are not optional and must come out of the budget before finishes are selected. Skipping this step to fund prettier finishes is the most expensive mistake in home remodeling.
Step 2: Refresh all surfaces that people see and touch. This is where budget renovations deliver outsized returns. Paint walls, paint or refinish cabinets, replace hardware and fixtures, and update light switches and outlet covers. These changes cost relatively little but transform the perception of the entire space. According to HomeAdvisor, a professional interior paint project averages $1,700 to $3,900 for a typical room, with a return of 60% to 100% at resale.
Step 3: Upgrade touch points. Replace faucets, showerheads, door handles, and cabinet pulls. These are the items that people physically interact with multiple times per day. Heavy, solid-feeling hardware communicates quality more effectively than expensive materials that sit in the background. Budget $500 to $1,500 for a full house of upgraded touch points.
Step 4: Improve lighting. Lighting is the most underrated renovation element. Replacing builder-grade fixtures with modern alternatives, adding under-cabinet lighting in kitchens, and installing dimmer switches creates dramatic changes at modest cost. Most rooms can be transformed with $200 to $500 in lighting upgrades, including installation. Layered lighting — combining overhead, task, and accent sources — makes rooms feel larger, warmer, and more intentionally designed without requiring any structural work.
Step 5: Paint last. This seems obvious, but many homeowners paint early in the renovation sequence, then damage the fresh paint during subsequent work. Painting should be the final step before cleaning and furniture placement. A fresh coat of paint ties everything together and conceals minor imperfections from earlier work.
Where DIY Saves Real Money (and Where It Costs More)
On AllBetter
Ready to get it done?
Fund escrow before work starts. Release payment when you approve the finished work.
Find a verified pro near you →Labor typically consumes 50% to 60% of a renovation budget. DIY on appropriate tasks can reduce that percentage significantly, but only when applied to the right work.
Good DIY tasks (require time, not specialized skill):
- Demolition and material removal
- Painting walls, cabinets, and trim
- Installing new hardware on cabinets and doors
- Removing old flooring and prepping subfloor
- Assembling and mounting open shelving
Tasks that require professionals (mistakes cost more than savings):
- Electrical panel work and new circuit installation
- Plumbing connections and gas line modifications
- Structural modifications to load-bearing walls
- Waterproofing in bathrooms and basements
- Tile installation in wet areas (shower walls and floors)
The distinction is simple: if a mistake creates a safety hazard or hidden damage that costs more to fix than the labor savings, it belongs with a professional. A good rule of thumb is to DIY anything that only affects appearance and to book a professional for anything that affects structure, water, gas, or electricity.
Small-Space Tactics: Reclaiming Square Footage Without Adding Any
In compact rooms, the budget logic above gets one more lever: recovering floor space you already own. A traditional hinged door consumes 10 to 15 square feet of swing space — in a 100-square-foot bedroom, that is 10% to 15% of the usable floor lost to a door arc. Swapping it for a sliding barn door ($200–$500 for hardware, plus the door), a pocket door ($500–$1,500 including framing changes), or a bi-fold door reclaims most or all of that clearance.
| Project | Typical Cost | Impact |
|---|---|---|
| Full room of floating shelves | $300 – $800 | High (vertical storage) |
| Sliding barn door conversion | $400 – $900 | Medium (space + design) |
| Murphy bed installation | $1,500 – $4,000 | High (frees 40–60 sq ft by day) |
| Built-in wardrobe | $1,500 – $5,000 | High (storage + resale value) |
Several of these combine into a single weekend sprint — paint, floating shelves, a sliding-door conversion, and lighting upgrades together transform a cramped room for under $2,000. A full small-room renovation typically lands at $2,000 to $5,000; adding custom built-ins or a Murphy bed pushes it to $5,000 to $10,000, still far below a large-scale remodel.
Warning: never remove an interior wall without a structural assessment first. Load-bearing walls carry the floors and roof above, and removing one without proper engineering risks sagging, cracking, or catastrophic structural failure. Confirming whether a wall is load-bearing costs $200 to $500 and is non-negotiable before demolition; removing a load-bearing wall requires steel beam installation at $3,000 to $10,000 depending on span.
For this kind of work, post each task to the right trade rather than bundling everything under a general contractor: a carpenter for built-ins and shelving, a handyman for door conversions and hardware, an electrician for new lighting circuits. Per-task booking keeps costs controlled and puts each job in specialist hands.
Avoiding Scope Creep: The Silent Budget Killer
Every renovation has a moment where the homeowner says something like: “While we have the walls open, could we also…” That sentence has destroyed more renovation budgets than any material price increase ever has.
Each addition triggers a cascade:
- New labor hours added to the schedule
- Additional materials ordered (often at rush pricing)
- Timeline extended, increasing total labor costs
- Other trades delayed, creating scheduling conflicts
The fix is straightforward: lock the scope of work in writing before demolition begins. Any changes after that point must be submitted as a formal change order with a written cost estimate and timeline impact. Both parties sign it before the additional work starts. This process does not prevent changes — it ensures that every change is a conscious decision rather than a casual request that spirals into thousands of unexpected dollars.
For a detailed look at how these costs add up and which renovations deliver real value, understanding the math before starting keeps expectations aligned with reality. One useful discipline is maintaining a change order log throughout the project. Every time you feel the urge to add something, write it down with the estimated cost. Review the log weekly. You will often find that the impulse passes, saving thousands in additions that seemed important in the moment but were not worth the budget impact.
Finding the Right Professionals on a Budget
Budget renovations rarely need a general contractor. Most high-impact updates — painting, fixture replacement, cabinet refinishing, lighting installation, and hardware upgrades — can be handled by individual tradespeople booked directly.
This approach eliminates the general contractor markup (typically 15% to 25% of total project cost) and gives you direct control over scheduling and pricing. A handyman can handle hardware installation, minor carpentry, and fixture swaps. A painter handles walls, cabinets, and trim. An electrician handles lighting upgrades. Each specialist does their scope of work without the overhead of a project management layer. On a $15,000 budget renovation, cutting out the GC markup saves $2,250 to $3,750 — enough to fund an entire room’s worth of finish upgrades.
AllBetter (a newer platform) connects homeowners directly with verified local professionals across every trade category. You post the specific project, compare quotes, and manage payment through escrow so you maintain control throughout the process. For budget renovations, this direct-booking model typically saves 15% to 20% compared to routing everything through a general contractor.
Building a smart renovation budget is only half the equation. Executing it with the right professionals at the right price is what separates a successful budget renovation from one that drifts into overspending. Start with the plan, stick to the scope, and let the results speak for themselves.
Ready to Start Your Budget Renovation?
Post your project on AllBetter, compare quotes from verified local pros, and pay through escrow protection. No GC markup.
Hire an ID-verified home services pro — without the lead-gen markup
| Feature | Angi / Thumbtack / HomeAdvisor | AllBetter |
|---|---|---|
| Pro Identity Verified | Self-attested, no verification | Stripe Identity verification on every pro |
| Lead Fees to Pros | $15–$80 per lead (passed back to homeowner) | only pay when you win |
| Payment Protection | None — you pay direct, hope for the best | Escrow Shield — you only release payment when work is approved |
| Pro Quality Filter | Anyone can sign up; reviews come later | ID-verified pros, average 3+ bids per job |
| Spam & Auto-Calls | Your phone rings for days after one inquiry | Zero spam — pros message in-platform |
Lead-fee context: home services leads on traditional platforms run $20-$80 each — that markup gets baked into your quote.
DIY-ing home services work without an ID-verified pro can turn a $200 fix into a $2,000 do-over — and the quality issues only show up months later. The safer move is to post the job on AllBetter — you get ID-verified bids in minutes, no obligation.
Your money sits in escrow and is released only when you approve the work.
Frequently Asked Questions
What is the cheapest renovation with the biggest visual impact?
Paint and hardware replacement consistently deliver the largest visual transformation per dollar spent. A full room repaint costs $1,700 to $3,900, and a complete set of new cabinet and door hardware costs $200 to $600. Together, these updates can make a space feel entirely new for under $5,000.
Should I replace cabinets or paint them?
Paint them unless they are structurally damaged, warped, or falling apart. Cabinet replacement in a standard kitchen costs $8,000 to $15,000. Professional cabinet painting costs $1,200 to $3,000 and produces a dramatic visual change. The math strongly favors painting for budget-conscious homeowners.
Is it ever worth moving plumbing on a budget renovation?
Only when the existing layout creates a genuine functional problem, such as a toilet blocking a doorway or a shower that cannot accommodate a standard tub. For purely aesthetic layout changes, the cost rarely justifies the result on a limited budget.
How much should I set aside for unexpected costs?
Reserve 15% to 20% of your total renovation budget as a contingency. For older homes, lean toward 20%. Common surprises include outdated wiring, water damage behind walls, inadequate insulation, and deteriorated subfloor — all of which are invisible until demolition begins.
Can luxury vinyl plank really replace hardwood?
For budget renovations, yes. Modern luxury vinyl plank closely mimics the appearance of hardwood at one-third to one-half the installed cost. It is also waterproof, making it suitable for kitchens and bathrooms where hardwood is not recommended. The trade-off is longevity — hardwood can be refinished multiple times over decades, while vinyl plank has a 15 to 25 year lifespan.
What renovation order saves the most money?
Fix structural and safety issues first, then refresh surfaces, upgrade touch points, improve lighting, and paint last. This sequence prevents rework damage, ensures the budget covers essential repairs before cosmetic choices, and produces the cleanest final result.
According to BLS — Occupational Outlook Handbook, BLS: home services demand continues to grow; quality + identity verification are the homeowner’s only baseline filters.
More AllBetter resources: